Contributing Guide#
Welcome! So, you’re interested in making your first open source contribution to STUMPY? We’re excited to start this journey with you. Here are some things that will help you get started.
Git and GitHub#
You don’t need a GitHub account to use STUMPY but you do need an account if you want to make a code or documentation contribution. This GitHub account will allow you to contribute to many of the most popular open source projects. Additionally, it will give you a place to store, track, and coordinate progress on your own projects. GitHub is a remote repository for the version control system git. Git is a versioning tool that tracks changes in projects by constructing a directed acyclic graph (fancy way of allowing us to create branches, revert changes, and identify conflicts). You can use git on your local machine but when you want to save your work or collaborate with other team members, you push your work to a remote repository. In this case, that remote will be GitHub.
With all of that in mind, you’ll also need to install git.
Warning: Don’t confuse git and GitHub. Git is a tool used for version control. GitHub is an online platform used as a remote repository for git projects.
Checklist:
Create GitHub account
Install Git
Find your contribution#
You’ve decided that you want to contribute but how do you approach a new project and figure out where you can help? This will feel like like trying to jump into a conversation that’s been happening for months (or years) and can often be intimidating. If you’ve used the project before, you’ll be more familiar with its structure and API but you probably haven’t “peeked behind the curtain”. The best place to get started is the list of Issues. These are feature requests/changes/bugs that other people have identified. Feel free to peruse the list to get a feel for all of the ongoing work in the project. Often, maintainers will have a labeling system to organize the issues. These labels may include things like documentation or enhancement. For new contributors, many projects have a good first issue label.
Your next stop, should always be CONTRIBUTING.md. Here, the maintainers outline any guidance they have for contributors,
If you click on any issue, you’ll see a running history of discussions. This serves as the record of thoughts around that specific issue. For some issues, you may see an ongoing conversation. In others, you may just see the initial issue. This is your chance to have a dialogue with the maintainers. If you’ve found an open issue that interests you and you think you may be able to solve it, feel free to leave a message. Remember that maintainers are people too and at STUMPY, they’re excited to help new contributors. Here’s an example of a potential message:
First time contributor here! I see that this issue is related to a bug caused by an incorrect variable name. Does that seem right to you? If so, I’d like to take this issue and submit a pull request to fix it.
This message does a couple of things. It shows that you’ve done a little bit of research into the issue (demonstrates respect for the maintainers’ time), gets their input (helps you solve the problem), and makes sure they will accept a pull request (saves your time/effort). Remember how you’re jumping into an ongoing conversation? Sometimes an issue will become irrelevant or obsolete based on changes happening elsewhere in the package. A quick note like this lets the maintainer know that you’re going to work on this issue and confirms that it is still a valuable issue.
Warning: If you can tell someone else is actively working on an issue, don’t take it.
Checklist:
Identify an issue
Read CONTRIBUTING.md
Post your proposal in the issue
Setup your Branch#
Okay, so you’ve chosen an issue to work on and the maintainers are excited to have your help. Now, let’s get to work!
First, you need to create a copy of the repository for you to work off of; this is called a fork. Here are instructions on forking a repository. Now you have your own copy associated with your GitHub account.
Next, you need to clone this copy of the repository. This simply downloads it to your computer so that you can work on it. Here are instructions on cloning a repository. It’s super important to remember to clone your fork and not STUMPY.
Then, you’ll need to create a branch. Here’s an overview of how git branches work but if you’re working in the command line, then you probably need to type git checkout -b branch_name. In this case, branch_name should be replaced with something descriptive about the change that you are making like change_incorrect_variable or document_x.
Now, any changes you make in the project will be reflected in your branch. Later, You’ll want your changes to be merged into the main STUMPY repository (so that everyone can benefit from your contribution). Your branch reflects all of these changes.
Warning: Create your branch before making any changes.
Checklist:
Fork STUMPY to your own account
Clone a local copy for your fork
Create a branch for your work
Adhere to CONTRIBUTING.md Guidance#
One of the great benefits of open source is the ability to collaborate with developers from around the world. However, you can imagine that combining their contributions into one coherent codebase while maintaining consistency can be challenging. Luckily, recent gains in automated tooling have made this a lot easier. Remember CONTRIBUTING.md? There are a couple of things we want to make sure we do before we submit a pull request.
First, if you implemented a new feature or changed an existing feature, then you are also responsible for providing the unit test. This can often be just as much work as the feature, so make sure you account for it.
Next, run flake8 and black. flake8 is a linter that checks the style and quality of the code. black makes any necessary changes to ensure consistent code format.
Checklist:
Write/update any unit tests
Run
black --exclude=".*\.ipynb" --extend-exclude=".venv" --diff ./to reformat any python files you changedRun
flake8 --extend-exclude=.venv ./to identify any formatting errors before you submit yourpull requestRun the unit tests. In STUMPY, you’ll run
./setup.sh dev && ./test.sh
Setting Up Your Environment#
When working on a new project, there are often going to be dependencies. In order to isolate dependencies between different projects, it’s a good practice to use a virtual environment. STUMPY supports both venv and conda. After creating and activating either of these virtual environments, any dependencies you install will be isolated (so they don’t break anything else on your system).
First, if you are using venv then you can install STUMPY and all of its the dependencies using the convenient ./setup.sh dev. If you are building STUMPY within a conda environment, then you may consider using the ./conda.sh shell script which will automatically assist you in installing all of the required dependencies required for STUMPY development.
A good check to make sure everything is working 100% is to run the unit tests. For STUMPY, we have scripts to help you do that. You’ll run ./setup.sh dev && ./test.sh. In some cases, you may notice an uninstallation message for STUMPY but don’t worry. This happens if you have had previously installed STUMPY as the ./setup.sh dev command first uninstalls any existing version of STUMPY and then it will re-installs it from source (the local, cloned, development version). So, everything should be all set.
Ideally, you’ll see the excellent STUMPY test coverage passing. If things start failing or breaking, then you may have a missing dependency problem. There’s nothing worse than finding this out after you’ve made changes.
If all of the tests pass, then you know that you have a working copy of STUMPY to start your development on. Go ahead and implement your feature or change!
Checklist:
Create a virtual environment
Install dependencies
Run the unit tests
Push your code to GitHub#
Now your fork contains updated code and unit tests that adhere to the STUMPY formatting standards. If you’re comfortable with git or have been doing work between multiple workstations, you may have pushed your commits to GitHub already. If not, then now is the time!
When you were working on your change, you probably saved your files all the time. Those changes were saved on your local machine, but never updated in version control. To do that, you’ll need to git add <files> (“hey git, please track these files”), git commit -m <message> (“hey git, at this point, I want to save”) and git push (“Hey git, take the last commit and move it to GitHub”) as described here. Remember to write a good commit message.
NOTE: Try to keep your commits small and easily digestable. A good rule of thumb is to keep each commit to 50 lines of code or less (excluding docstrings).
Warning: If this is your first time using git, it may through a warning about global settings. Luckily, that warning tells you exactly how to fix it.
Checklist:
git add your_filegit commit -m 'Great Commit Message'git push
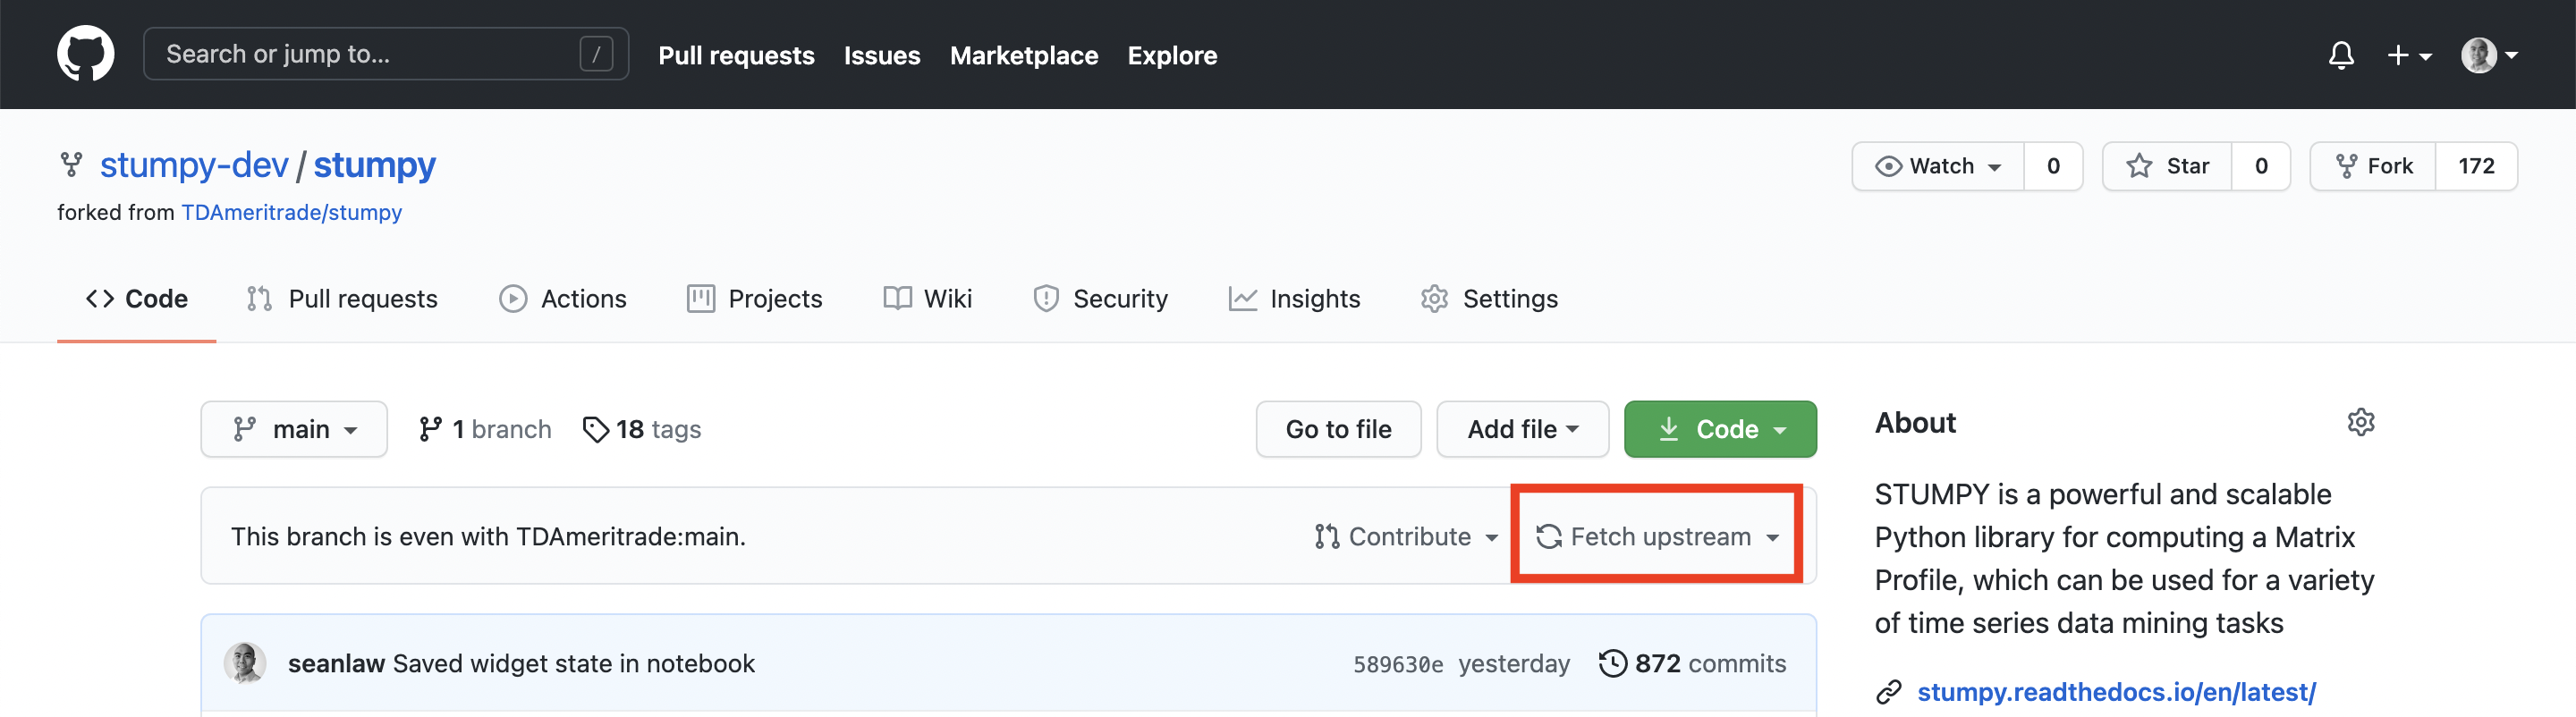
Sync your Fork with the Parent Repository#
While you are working on your development branch, it is likely that the STUMPY repository will have undergone new changes that your fork does not have. It is recommended, therefore, to sync your fork with its parent repository before submitting a pull request. For more information refer to the Github documentation.
Checklist (fetching upstream through Github):
Sync your fork with the upstream/parent repository (see screenshot below)
git checkout maingit pullgit checkout branch_namegit merge mainRun the unit tests:
./setup.sh dev && ./test.sh
Checklist (fetching upstream locally):
git fetch upstreamgit checkout maingit merge upstream/maingit checkout branch_namegit merge mainRun the unit tests:
./setup.sh dev && ./test.sh
Instructions for Pulling Main into a Development Branch
Open a terminal
Change the current working directory to your local development repository (e.g., cd Git/stumpy_dev.git)
Check out your local development branch (e.g., git switch some_new_feature)
Commit all changes in your local development branch (e.g., git add some_file.py and git commit)
Fetch the branches and their respective commits from the upstream repository (e.g., git fetch upstream)
Check out your fork’s local default branch (e.g., git checkout main)
Merge the changes from the upstream default branch - in this case, upstream/main - into your local default branch (e.g., git merge upstream/main). This brings your fork’s default branch into sync with the upstream repository, without losing your local changes.
If your local main branch didn’t have any unique commits, Git will perform a fast-forward. Otherwise, if your local main branch had unique commits, you may need to resolve conflicts. Note that this does not affect your development branch!
Next, switch over to your development branch (e.g., git switch some_new_feature)
Finally, merge the main branch into your development branch (e.g., git merge main)
You may see something like the following, if you do, you will need to open up the files tagged with CONFLICT and resolve the merge conflicts. Once that’s done, you will need to commit the changes and push the commit (e.g., git push) back to Github.
git merge main
Auto-merging stumpy/aamp_stimp.py
Auto-merging stumpy/core.py
Auto-merging stumpy/mpdist.py
CONFLICT (content): Merge conflict in stumpy/mpdist.py
Auto-merging stumpy/mstumped.py
CONFLICT (content): Merge conflict in stumpy/mstumped.py
Auto-merging stumpy/ostinato.py
Auto-merging stumpy/stimp.py
CONFLICT (content): Merge conflict in stumpy/stimp.py
Auto-merging stumpy/stumped.py
CONFLICT (content): Merge conflict in stumpy/stumped.py
Automatic merge failed; fix conflicts and then commit the result.
You will need to open up the files tagged with CONFLICT and resolve the merge conflicts. Once that's done, you will need to commit the changes and push the commit (e.g., git push) back to Github.
Create a Pull Request#
Now, your updated code is on GitHub in your fork of STUMPY. If you want the STUMPY maintainers to see it, you need to create a Pull Request. There are instructions here, but GitHub is also pretty smart. If you navigate to your fork of the repository shortly after you push a commit, you’ll often see a message like “Your recently pushed branches: X <Compare & Pull Request>”. Clicking that will automatically create your pull request. Like a commit, make sure to give it a descriptive name. If your change isn’t quite working yet, then you can preface your pull request with [WIP] which stands for “Work in Progress.” In the body of your Pull Request, reference the Issue Number that you’re working on. GitHub will automatically link your pull request to that issue. This just makes housekeeping and cross referencing a lot easier.
Here’s your next chance to communicate with the maintainers. Let them know what changes you made and if you need any help. This pull request will now be the running dialogue between you and the maintainers as you work on the issue.
Continuous integration systems automatically determine the suitability of merging pull requests. They check the formatting, test coverage, and test success of your code. After you submit a pull request, you’ll see these running (as comments in your pull request). If they fail, your code will not be merged until the failure is fixed. In STUMPY, locally passing flake8, black, and ./setup.sh dev && ./test.sh should ensure your continuous integration tests pass.
Checklist:
Create a Pull Request
Write an informative Pull Request Message
Monitor your Pull Request for continuous integration checks and messages from the maintainers
Work on your Pull Request (PR)#
It is extremely likely that the maintainer will have questions, comments, or suggestions on your PR. This is an opportunity for collaboration and should benefit both parties. Also, it is useful to know that you do not need to create a new branch if you are going to work on the same issue for which you’ve already submitted a PR. Instead, based on the maintainers’ feedback, continue refining your contribution using the same branch that you had used before. Now, every commit that you make and push will automatically be reflected in the existing pull request. To recap, if you already have an existing open PR, then after you make any changes in your local code just commit and push to your fork like before and these changes will automatically show up in the corresponding PR.
Warning: After every change, make sure to run your formatting checks and unit tests.
Checklist:
Be open minded, responsive, and polite
Merge!#
When the contribution is nice and polished, the maintainers will merge it into STUMPY. Success!
Checklist:
Celebrate
Go find another issue
What to do when it goes wrong#
Invariably, something goes wrong. Remember, you’re not in this alone. The open source community is a community and we appreciate your interest and contribution to STUMPY. If your barrier is related to an issue already filed in GitHub, that issue probably a great place to request additional information and help. If your barrier is related to your solution to an issue, go ahead and submit your progress as a pull request. As always, be polite and be patient.
Final Checklist:#
Create GitHub account
Install Git
Identify an issue
Read CONTRIBUTING.md
Post your proposal in the issue
Fork STUMPY to your own account
Clone a local copy
Create a branch for your work
Create a virtual environment
Install dependencies
Run the unit tests
Write/update any unit tests
Run
black --exclude=".*\.ipynb" --extend-exclude=".venv" --diff ./to reformat any python files you changedRun
flake8 --extend-exclude=.venv ./to identify any formatting errors before you submit yourpull requestRun the unit tests. In STUMPY, you’ll run
./setup.sh dev && ./test.shgit add your_filegit commit -m 'Great Commit Message'git pushCreate a Pull Request
Write an informative Pull Request Message
Monitor your Pull Request for continuous integration checks and messages from the maintainers
Be open minded, responsive, and polite
Celebrate
Go find another issue